
Imagine starting your vehicle in the morning, only to notice the rear end sagging down toward the pavement like a loaded pack mule. You start the engine, waiting for the familiar hum of the air compressor, but nothing happens. Or worse, the compressor runs continuously until it overheats and burns out.
If you own a luxury SUV, heavy-duty truck, or performance sedan equipped with factory air suspension—such as a Range Rover, Audi Q7, Mercedes-Benz GL-Class, or Ram 1500—this scenario is likely all too familiar. Air suspension systems offer a smooth, floating ride height control and load leveling. However, as these systems age, their complex networks of rubber bladders, plastic lines, solenoid valves, and electronic sensors inevitably deteriorate.
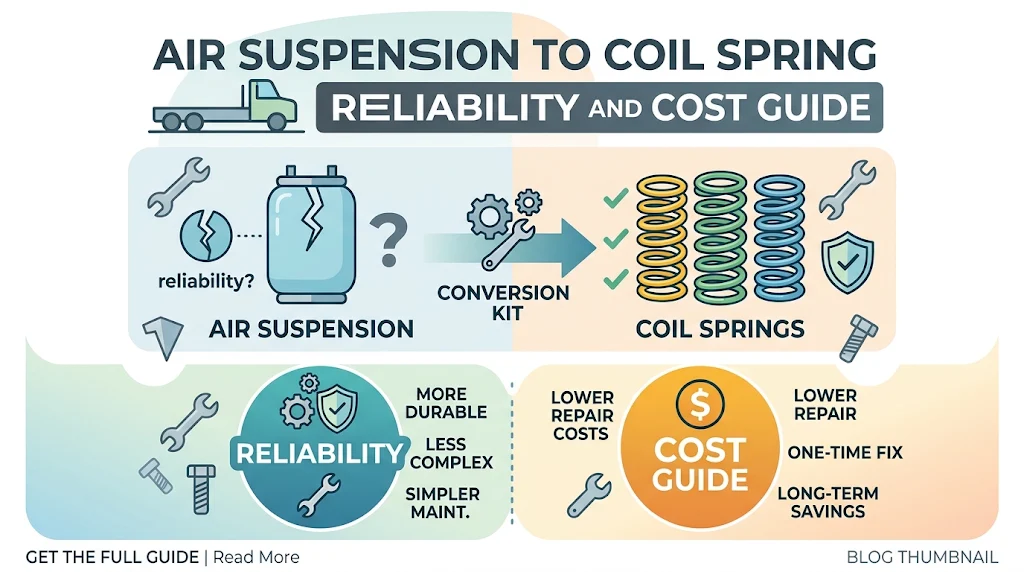
When faced with an air suspension failure, vehicle owners hit a major fork in the road: spend thousands of dollars replacing fragile OEM air components, or eliminate the problem permanently with an air suspension to coil spring conversion kit.
This comprehensive guide breaks down everything you need to know about converting your vehicle from air suspension to traditional coil springs. We will analyze real-world reliability, itemize all associated costs, examine ride quality trade-offs, and walk through the decision-making framework to help you choose the best path for your vehicle and budget.
Understanding the Air Suspension Dilemma: Why Systems Fail
To appreciate why conversion kits have become one of the most popular aftermarket upgrades in the brake and suspension sector, it helps to understand why air suspensions fail so frequently as vehicles cross the 60,000 to 100,000-mile mark.
+-----------------------------------------------------------------------+
|                    TYPICAL AIR SUSPENSION FAILURE CHAIN               |
+-----------------------------------------------------------------------+
| 1. Micro-cracks develop in rubber air springs due to age & ozone      |
| 2. Slow air leak causes height drop overnight                         |
| 3. Air compressor operates at 100% duty cycle to compensate           |
| 4. Compressor overheats, ingests moisture, and burns out relay/motor   |
| 5. System throws ECU fault codes and locks vehicle in "Limp Mode"     |
+-----------------------------------------------------------------------+
An air suspension system relies on a complex network of interconnected mechanical, pneumatic, and electronic components:
-
Air Springs (Air Bags): Vulcanized rubber bladders that inflate to support vehicle weight.
-
Air Compressor/Dryer: An onboard electric pump that delivers compressed air.
-
Valve Block: Solenoid-operated valves that route air to individual corners.
-
Height Sensors: Electronic linkage arms mounted at each wheel that report vehicle height to the computer.
-
Control Module (ECU): The computer brain that constantly calculates and adjusts pressure levels.
The Chain Reaction of Failure
Air suspension components rarely fail in isolation. The primary vulnerability is the rubber air bag itself. Over time, exposure to road salt, heat, ozone, and constant flexing creates micro-cracks in the rubber bladder.
When a small air leak develops, the onboard compressor must run twice as often to maintain proper ride height. Because these small compressors are designed for short duty cycles, continuous operation leads to thermal overload. Moisture enters the lines, freezing in cold weather or corroding solenoid valves, until the compressor burns out completely.
What starts as a minor $200 rubber leak quickly cascades into a $3,000 overhaul requiring a new compressor, valve block, and air struts.
Key Takeaway: Air suspension systems suffer from single-point dependency. A single leaking rubber bladder forces the compressor to overwork, causing a cascading system failure that leaves the vehicle un-drivable.
What Is an Air to Coil Spring Conversion Kit?
An air suspension conversion kit is a engineered aftermarket assembly designed to replace factory pneumatic air struts and bags with traditional, mechanical steel coil springs and conventional hydraulic or gas-charged shock absorbers.
+-----------------------------------+-----------------------------------+
|     FACTORY AIR SUSPENSION        |     COIL SPRING CONVERSION        |
+-----------------------------------+-----------------------------------+
| • Rubber air bladders             | • Cold-wound steel coil springs   |
| • Electric compressor pump        | • Gas-charged hydraulic shocks    |
| • Solenoid valve manifold         | • Direct-fit mounting hardware    |
| • Plastic airline tubing          | • Electronic Bypass Module (EBM)  |
| • 4x Ride height sensors          | • Zero active electronics needed  |
+-----------------------------------+-----------------------------------+
Key Components of a Conversion Kit
A complete, high-quality conversion kit includes:
-
Cold-Wound Steel Coil Springs: Custom-engineered springs calibrated to match the vehicle’s specific weight distribution, gross vehicle weight rating (GVWR), and factory ride height.
-
Matching Shock Absorbers/Struts: Monotube or twin-tube shocks tuned specifically to control the rebound and compression frequencies of the new coil springs.
-
Custom Top Mounts and Hardware: CNC-machined or heavy-gauge stamped brackets that bolt directly into factory mounting points without requiring cutting, welding, or structural fabrication.
-
Electronic Bypass Module (EBM): A small plug-and-play wiring module (or software override tool) that connects to the vehicle’s ECU to suppress suspension warning lights, error codes, and speed-limiter triggers.
Reliability Breakdown: Air Suspension vs. Coil Springs
When evaluating suspension options, reliability is the primary driver for most vehicle owners. Let’s compare how pneumatic air systems hold up against mechanical steel springs over time.
| Evaluation Metric | Factory Air Suspension | Coil Spring Conversion Kit |
| Expected Lifespan | 50,000 – 80,000 miles | 100,000 – 150,000+ miles |
| Failure Modes | Leaks, compressor burnout, valve stuck, sensor failure | Gradual spring sagging (rare), shock wear |
| Vulnerability to Weather | High (rubber degrades, lines freeze) | Extremely Low (powder-coated steel) |
| Maintenance Required | System leak checks, dryer replacement | Periodic shock inspection |
| Stranding Risk | High (sudden drop to bump stops) | Extremely Low (fails gradually over years) |
Why Steel Springs Outlast Air Bladders
Steel coil springs operate on simple, proven physics: mechanical tension. High-tensile chrome-silicon or carbon-steel alloys are heat-treated and shot-peened to resist sag and stress fatigue. Unlike rubber air bladders, steel springs are unaffected by:
-
Sub-zero temperatures: Rubber hardens and cracks in freezing weather; compressed air lines freeze when moisture accumulates inside the air dryer.
-
Chemical exposure: De-icing chemicals, road salt, oil, and brake fluid rapidly break down synthetic rubber compounds.
-
Off-road abrasion: Sand, gravel, and mud collect in the folds of air bladders, acting like sandpaper every time the suspension compresses.
The “Limp Mode” Risk
One of the greatest hazards of air suspension failure is getting stranded. When an air spring bursts or a compressor fails, the vehicle drops down onto its hard rubber bump stops.
Driving a vehicle resting on its bump stops can damage the chassis, destroy aluminum control arms, ruin tires on fender wells, and severely impair steering control. Most modern vehicles trigger an automatic speed restriction (often limited to 30–35 mph) when an air suspension fault is detected.
In contrast, even if a hydraulic shock absorber in a conversion kit loses fluid, the steel coil spring continues to support the full weight of the vehicle at its normal ride height. You can safely drive the vehicle home or to a repair shop without risking structural damage or needing a flatbed tow truck.
Pro Tip: If you frequently drive through remote regions, tow heavy trailers, or take long road trips, converting to coil springs eliminates the risk of an unexpected suspension collapse far from service centers.
Cost Comparison: Repairing Air vs. Converting to Coil
The financial argument for air suspension conversion is compelling. Below is an itemized breakdown comparing the costs of fully repairing a failed 4-corner air suspension system against installing a complete coil spring conversion kit.
COST COMPARISON: AIR REPAIR VS. COIL CONVERSION

Factory Air Overhaul:  [$$$$$$$$$$$$$$$$$$$$] $3,500 - $7,000+
Coil Conversion Kit:   [$$$$$$$$] $900 - $2,200 (Parts + Labor)
Scenario A: Repairing Factory Air Suspension (4-Corner Replacement)
-
Front Air Struts (Pair): $1,200 – $2,800 (OEM)
-
Rear Air Springs & Shocks: $800 – $1,800
-
Air Suspension Compressor Pump: $600 – $1,400
-
Valve Block & Sensors: $400 – $800
-
Labor (6 – 10 hours at $150–$220/hr): $900 – $2,200
-
Total Estimated Cost: $3,900 – $9,000+
Note: Replacing only the single broken air spring is a short-term fix. The remaining original air bags and compressor usually fail shortly thereafter, multiplying labor costs over time.
Scenario B: Installing a Coil Spring Conversion Kit
-
Complete 4-Corner Conversion Kit: $500 – $1,300
-
Electronic Bypass Module (Included in quality kits): $0 – $150
-
Labor (4 – 6 hours at $150–$220/hr): $600 – $1,320
-
Wheel Alignment: $100 – $200
-
Total Estimated Cost: $1,200 – $2,970
+-----------------------------------------------------------------------+
|                       AVERAGE DIRECT SAVINGS                          |
|                                                                       |
|     Converting to coil springs typically saves owners between         |
|     50% to 70% compared to a full OEM air suspension repair.         |
+-----------------------------------------------------------------------+
Long-Term Ownership Economics
Beyond the immediate installation savings, consider the vehicle’s total cost of ownership. If you intend to keep your vehicle for another 3 to 7 years, an OEM air suspension system will likely require a second round of costly repairs down the road.
Once converted to coil springs, routine suspension maintenance drops back to standard service intervals—replacing worn shock absorbers every 80,000 to 100,000 miles at a fraction of the cost of air struts.
Ride Quality, Handling, and Towing Performance
The most common concern drivers express before converting is: “Will my vehicle ride like a stiff lumber wagon after installing coil springs?”
The short answer is no—provided you choose a high-quality, vehicle-specific conversion kit. However, there are inherent mechanical differences between air and steel springs that you should understand.
Air vs. Steel: The Spring Rate Factor
-
Air Springs (Progressive Rate): Air compresses exponentially. As an air bag compresses, the internal air pressure rises rapidly, creating a very soft ride over small bumps and a firmer rate during sharp impacts.
-
Linear/Progressive Coil Springs: Quality conversion kits use variable-rate or progressive-rate coil springs. The top coils are spaced closely together to absorb minor road chatter (expansion joints, small potholes), while the lower coils are wound tighter to handle heavy compression, cornering body roll, and cargo weight.
SPRING COMPRESSION PROFILES

Air Spring:         [ Soft ] ---> [ Exponentially Stiff ]
Linear Coil:        [ Constant Stiffness Throughout Travel ]
Progressive Coil:   [ Plush Top ] ---> [ Firm Base ]  <-- Best for Conversion
Ride Comfort Evaluation
On normal paved roads, highway cruises, and moderate bumps, a premium progressive coil spring kit yields a ride nearly indistinguishable from the original air system in its “Comfort” setting. You will lose the ability to lower the vehicle for easier entry or push a button to raise the chassis for off-road clearance, but the baseline ride quality remains comfortable and controlled.
Handling and Cornering Stability
In many cases, converting to coil springs actually improves dynamic handling and body control. Air bags can feel floaty or disconnected during fast cornering or rapid lane changes. Cold-wound steel springs deliver predictable, linear sway resistance, reducing body roll and improving steering response when maneuvering through twisty roads.
Towing and Heavy Payload Considerations
Factory air suspension systems feature automatic self-leveling: when you drop a 600-lb tongue-weight trailer onto the hitch, the compressor inflates the rear air bags to keep the vehicle level.
Steel springs cannot auto-adjust their height. If you regularly tow heavy trailers or carry maximum payload capacities, a standard coil conversion kit will exhibit moderate rear-end sag under heavy load.
Real-World Example: If you frequently tow heavy loads with a converted vehicle, select a “Heavy-Duty Load” conversion kit featuring stiffer rear spring rates, or install an auxiliary set of internal spring helper bags.
How to Choose the Right Conversion Kit
Not all conversion kits are created equal. The aftermarket space ranges from premium, vehicle-tailored systems to low-quality budget components. Use the following framework when selecting a kit:
+-----------------------------------------------------------------------+
|                CONVERSION KIT SELECTION CHECKLIST                     |
+-----------------------------------------------------------------------+
| [ ] Are the springs engineered specifically for my engine size?       |
| [ ] Does the kit include an Electronic Bypass Module (EBM)?           |
| [ ] Are the strut assemblies fully pre-assembled (loaded)?            |
| [ ] Is there a minimum 5-year or Limited Lifetime Warranty?           |
| [ ] Are replacement shocks readily available off-the-shelf?           |
+-----------------------------------------------------------------------+
1. Match Engine and Trim Configurations
A V8 engine weighs significantly more than a V6 or turbocharged 4-cylinder engine. Ensure the kit manufacturer offers distinct spring rates calibrated for your vehicle’s exact engine size, wheelbase, and drivetrain (AWD vs. 2WD). Generic “one-size-fits-all” kits often result in an improper ride height or a harsh, uneven ride.
2. Verify Electronic Bypass Compatibility
Modern vehicle networks (CAN-bus systems) track suspension telemetry closely. Disconnecting factory air struts without addressing the electronics can trigger dashboard warning lights, disable traction control/ABS systems, or lock headlight auto-leveling functions.
Always choose a kit that includes a dedicated Electronic Bypass Module (EBM) or step-by-step instructions for re-coding the vehicle’s suspension module using standard diagnostic tools (such as VCDS, FORScan, or ISTA).
3. Opt for “Loaded” Pre-Assembled Struts
Save on installation time and labor costs by selecting pre-assembled strut units (often called “quick-struts”). These come with the coil spring, shock absorber, strut mount, bearing plate, and spring seat pre-compressed and assembled from the factory.
Installing loaded assemblies avoids the dangerous task of using a manual spring compressor and cuts shop installation time almost in half.
Step-by-Step Overview of the Conversion Process
While detailed installation procedures vary depending on the vehicle make and model, the general conversion process follows these main steps.
+-----------------------------------------------------------------------+
|                    CONVERSION INSTALLATION FLOW                       |
+-----------------------------------------------------------------------+
| Step 1: Depressurize System  -->  Step 2: Disconnect Power            |
| Step 3: Remove Air Struts    -->  Step 4: Install Coil Assemblies     |
| Step 5: Wire Bypass Module   -->  Step 6: Perform 4-Wheel Alignment  |
+-----------------------------------------------------------------------+
Step 1: System Depressurization & Safety
Before loosening any pneumatic fittings, mechanics must fully depressurize the air suspension system using a diagnostic scan tool or by manually venting the air lines at the valve block. High-pressure air lines (operating at up to 150+ PSI) can cause severe injury if unbolted under pressure.
Step 2: Electrical System Disablement
Disconnect the main vehicle battery and pull the dedicated fuse or relay powering the air suspension compressor. This prevents the compressor from attempting to turn on once the air struts are unhooked.
Step 3: Removing OEM Air Hardware
The wheel is removed, and the height sensor linkage, brake line brackets, and sway bar end links are unbolted from the air strut housing. The top mounting nuts are loosened, allowing the air spring/strut assembly to be extracted from the wheel well.
Step 4: Installing the Coil Spring Assembly
The new pre-assembled coil spring strut is lifted into position and secured to the upper chassis mount. The lower mount is bolted to the control arm or steering knuckle using factory torque specifications.
Step 5: Wiring the Electronic Bypass Module
The installer locates the factory suspension ECU (typically housed in the trunk or under the dashboard) and splices in the Electronic Bypass Module. This tricks the vehicle’s computer into sensing normal pneumatic pressures and heights across all four corners.
Step 6: Post-Installation 4-Wheel Alignment
Installing new springs and shocks alters the vehicle’s static ride height and suspension geometry. A comprehensive 4-wheel alignment is mandatory immediately following installation to prevent rapid, uneven tire wear and ensure correct vehicle handling.
Common Pitfalls and Mistakes to Avoid
Converting your suspension is a straightforward mechanical job, but oversight in a few critical areas can lead to premature wear or frustration.
Mistake 1: Reusing Worn Suspension Bushings
-
The Mistake: Installing a brand-new coil conversion kit while leaving worn, cracked control arm bushings, sway bar links, or ball joints in place.
-
The Fix: Inspect all surrounding rubber suspension hardware during the teardown process. Replacing worn control arms or sway bar bushings while the suspension is already disassembled saves hundreds of dollars in redundant labor down the road.
Mistake 2: Skipping the Electronic Bypass Module
-
The Mistake: Unplugging the air compressor and struts without installing a bypass module or reprogramming the ECU.
-
The Fix: Your dashboard will light up with permanent warning messages (“Suspension Fault,” “Max Speed 35 MPH”), and your vehicle may fail state safety inspections. Always confirm that your kit includes a functional EBM solution for your exact vehicle model year.
Mistake 3: Neglecting Post-Installation Wheel Alignment
-
The Mistake: Driving the vehicle long-term without aligning the wheels after changing suspension components.
-
The Fix: Steel springs settle slightly over their first 100 to 300 miles of operation. Schedule a formal 4-wheel alignment within a week of installation to set proper camber, caster, and toe settings.
Frequently Asked Questions (FAQs)
Will converting from air to coil springs void my vehicle’s insurance or warranty?
Converting to a high-quality, direct-fit coil spring conversion kit does not void your auto insurance policy. For factory or aftermarket warranties, under the Magnuson-Moss Warranty Act, a manufacturer cannot void your overall vehicle warranty simply because you installed aftermarket parts, unless they can prove the aftermarket part directly caused a specific failure.
How much does an air-to-coil conversion kit lower or raise my vehicle?
Standard conversion kits are engineered to match the vehicle’s original factory “Normal” ride height (within +/- 0.5 inches). Some specialty manufacturers offer heavy-duty kits (which maintain ride height under heavy loads) or lowered/lifted conversion options for off-road applications.
Can I install an air suspension conversion kit myself in my garage?
If you have intermediate-to-advanced DIY mechanical skills, standard shop tools, floor jacks, jack stands, and a torque wrench, you can perform the conversion yourself in roughly 4 to 8 hours. However, if your kit requires compressing bare springs onto shocks manually or tapping into complex wiring looms, professional installation by a certified technician is strongly recommended.
Why do luxury car manufacturers use air suspension if coil springs are more reliable?
Vehicle manufacturers install factory air suspension systems to achieve three main goals: high-end dynamic ride comfort, automatic self-leveling when carrying heavy loads or passengers, and aerodynamic height adjustments at highway speeds. However, auto manufacturers design these systems for initial new-vehicle buyers (typically under lease or factory warranty), rather than long-term reliability past 100,000 miles.
Conclusion: Making the Final Decision
Air suspension systems deliver impressive ride comfort and load-leveling capabilities when brand new. However, as these vehicles age, the ongoing cost of diagnosing, repairing, and replacing failed pneumatic components turns air suspension into a major financial liability.
Converting to a steel coil spring conversion kit offers a permanent, cost-effective solution. By swapping out fragile bladders, leaky lines, and overworked compressors for cold-wound steel springs and tuned gas shocks, you eliminate stranding risks and save thousands of dollars in maintenance over the life of your vehicle.

Benjamin Grey is an automotive engineer and writer at Car Parts Advisor. With years of experience in the automotive industry, he shares expert advice on car parts, maintenance, and repairs to help car owners keep their vehicles running smoothly.


