
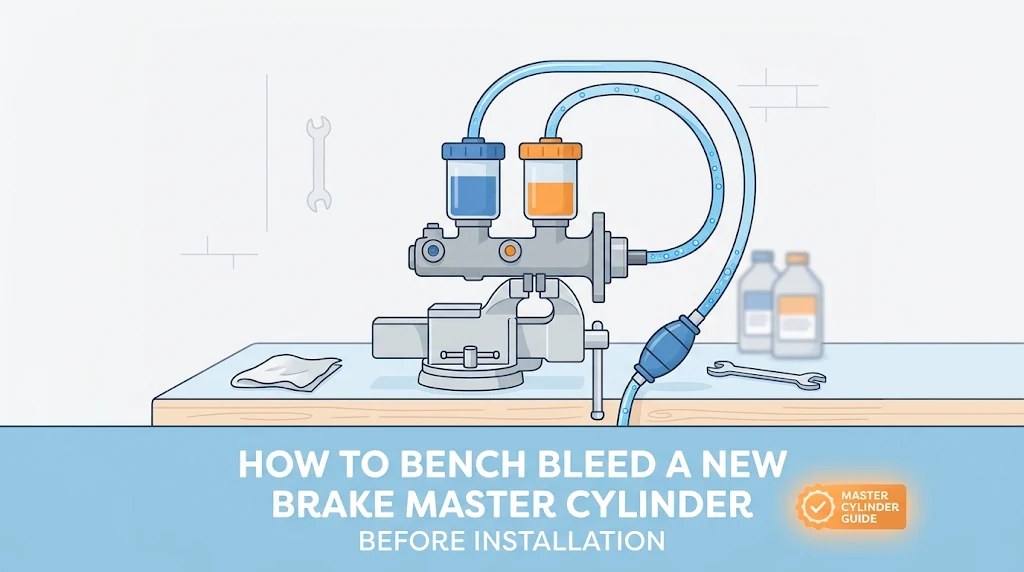
Replacing a brake master cylinder is a critical rite of passage in automotive maintenance. Whether you are tackling a spongy pedal on a weekend project car or restoring a vintage classic, a failing master cylinder can compromise your entire stopping system. However, many DIYers and even professional mechanics make a critical mistake right out of the gate: installing a brand-new master cylinder straight out of the box without bench bleeding it first.
If you skip this step, trapped air inside the cylinder bores and piston chambers will migrate into your brake lines. No matter how many times you bleed your wheels afterward, that stubborn air bubble will compress under your foot, resulting in a terrifyingly spongy brake pedal, increased stopping distances, and potential brake failure.
In this comprehensive guide, we will break down everything you need to know about how to properly bench bleed a new brake master cylinder, the tools required, common pitfalls to avoid, and expert tips to guarantee a rock-solid pedal feel the first time you hit the brakes.
Understanding the Physics: Why Bench Bleeding Matters
To understand why bench bleeding is non-negotiable, you must first understand how a master cylinder operates. When you press the brake pedal, pushrods inside the master cylinder force pistons forward, pressurizing brake fluid and sending it down the brake lines to the calipers and wheel cylinders.
A brand-new master cylinder is completely dry on the inside, filled only with ambient air. When you bolt it directly to the vehicle and fill the plastic reservoir with brake fluid, gravity alone cannot force all the trapped air out of the internal bores, tiny compensation ports, and blind cavities.
The Air Compression Problem
-
Air is compressible: Unlike hydraulic fluid, which is virtually incompressible, air can be squeezed into a fraction of its volume.
-
The spongy pedal syndrome: Any air trapped inside the master cylinder acts like a shock absorber, absorbing the hydraulic pressure generated by your foot instead of transferring it to the brake pads.
-
Catastrophic delay: This delay translates directly into excessive pedal travel before your brakes actually begin to bite.
Pro Tip: Think of bench bleeding as priming a water pump. If a pump is full of air pockets, it cannot pull water efficiently. Priming (or bench bleeding) ensures the internal chambers are 100% saturated with fluid before any hydraulic work begins.
Tools and Materials Needed for the Job
Before you pull your old master cylinder or unbox the new one, gather your equipment. Having everything organized on your workbench prevents messy spills and prevents brake fluid from damaging surrounding painted surfaces.
-
New Brake Master Cylinder: Ensure it matches your vehicle’s exact year, make, model, and brake configuration (with or without ABS/power brakes).
-
Bench Bleeder Kit: Usually includes plastic barbed fittings, clear vinyl tubing, and short plastic clips (most new master cylinders come with these included in the box).
-
A Sturdy Bench Vise: To hold the master cylinder securely and level while you work.
-
Brake Fluid: DOT 3, DOT 4, or DOT 5.1 (always check your owner’s manual or reservoir cap for the exact specification required). Never mix fluid types.
-
Shop Towels and Rags: Brake fluid is an aggressive paint stripper; keep towels handy to catch drips immediately.
-
Line Wrenches (Flare Nut Wrenches): Essential for removing hard brake lines without rounding off the fittings on the vehicle.
-
Safety Glasses and Gloves: Brake fluid is highly corrosive to skin and eyes.
Step-by-Step Guide: How to Bench Bleed a Brake Master Cylinder
Bench bleeding is a straightforward process, but it requires patience and steady, controlled movements. Follow these steps meticulously for professional results.
Step 1: Secure the Master Cylinder in a Vise
Mount the master cylinder horizontally in a bench vise. Clamp it gently by the mounting flange or the reinforced casting body. Do not overtighten the vise, as aluminum or cast-iron housings can crack or distort under excessive pressure. Ensure the cylinder sits completely level or tilted slightly upward toward the rear so air bubbles naturally migrate toward the outlet ports.
Step 2: Install the Plastic Bleeder Tubes
Take the threaded plastic adapters from your bleeder kit and screw them securely into the outlet ports (where the hard brake lines normally attach). Push the clear vinyl tubing onto the barbs. Route the other end of the clear tubes up and over the edge of the plastic fluid reservoir, dropping the tips securely inside the fluid chambers so they are submerged beneath the fluid level.
Crucial Step: Submerging the ends of the tubes in brake fluid prevents air from being sucked back into the master cylinder when you release the pistons. If the tubes are left hanging in open air, every stroke will simply draw air back into the system.
Step 3: Fill the Reservoir
Pour fresh, clean brake fluid from a freshly opened container into the plastic reservoir until it reaches the “MAX” line.
-
Warning: Never use old brake fluid from an unsealed container left sitting on a shelf. Brake fluid is hygroscopic—meaning it absorbs moisture from the air over time. Water contamination lowers the boiling point of the fluid and causes internal corrosion.
Step 4: Perform the Pumping Strokes
Using a blunt tool like a wooden dowel, a screwdriver handle, or a socket extension, press firmly and slowly into the center of the piston bore (where the brake booster pushrod normally connects).
-
Push the piston all the way in with a smooth, controlled stroke.
-
Hold it briefly at the bottom of its travel.
-
Allow the piston to return fully and slowly under its own spring pressure.
Step 5: Observe and Repeat
As you pump, watch the clear vinyl tubes. You will see a flurry of air bubbles mixed with brake fluid rushing through the tubes into the reservoir.
-
Continue this pumping cycle steadily.
-
As fluid is pumped out through the tubes, monitor the reservoir level and top it off frequently so it never runs dry. If the reservoir runs empty, you will suck air back into the master cylinder and have to start over.
-
Repeat this process until zero air bubbles emerge from the tubes, and the fluid flowing through the clear lines runs completely solid and clear. This usually takes between 15 to 30 full strokes.
Common Pitfalls and Mistakes to Avoid
Even experienced mechanics occasionally run into issues during bench bleeding. Keep these common traps in mind to ensure a hassle-free installation:
-
Rushing the Strokes: Pumping the piston too fast creates turbulence and froths the brake fluid into micro-bubbles that are difficult to expel. Keep strokes slow, deliberate, and smooth.
-
Allowing the Reservoir to Run Dry: This is the #1 mistake. If the fluid level drops below the intake ports inside the reservoir, air enters the primary bore immediately.
-
Using Contaminated or Old Fluid: Moisture-laden fluid degrades braking performance and causes premature seal failure inside the master cylinder. Always use fresh fluid from a sealed container.
-
Ignoring Spills on Painted Surfaces: Brake fluid strips automotive paint instantly. If a drop spills onto your fender or workbench, flush it immediately with copious amounts of water or rubbing alcohol. Do not wipe it with a dry rag, as this will smear the chemical across the paint.
Frequently Asked Questions (FAQ)
Can I bench bleed a master cylinder while it is installed on the vehicle?
While it is technically possible to bleed a master cylinder on the car using bleed plugs or “stutter bleeding” the lines, it is messy, highly inefficient, and makes it very difficult to purge all trapped air from the primary bore. Bench bleeding on a workbench before installation is always the industry-standard best practice.
Do I need to bleed the brake lines at the wheels after bench bleeding?
Yes, absolutely. Bench bleeding only removes air from the master cylinder itself. Once the master cylinder is installed on the vehicle, you must still bleed the entire hydraulic system (calipers and wheel cylinders) starting from the wheel furthest from the master cylinder and working your way to the closest.
What kind of brake fluid should I use?
Always match the fluid type specified on your master cylinder reservoir cap or owner’s manual (typically DOT 3 or DOT 4). Never mix DOT 5 (silicone-based) with DOT 3 or DOT 4 (glycol-based), as they are chemically incompatible and will destroy your rubber brake seals.
What causes a brake pedal to slowly sink to the floor after replacement?
If your pedal slowly creeps to the floor while holding pressure at a stoplight after a replacement, it typically indicates an internal bypass (faulty master cylinder seals) or a lingering air pocket in the system. Ensure you thoroughly bench bled the unit and check all caliper connections for external leaks.
Conclusion
Bench bleeding a new brake master cylinder is a vital step that bridges the gap between a mechanical repair and a safe, reliable braking system. By taking the extra 10 to 15 minutes to secure the unit in a vise, submerge your return lines, and patiently cycle the pistons until all air bubbles vanish, you eliminate guesswork and guarantee a firm, confident pedal feel.

Benjamin Grey is an automotive engineer and writer at Car Parts Advisor. With years of experience in the automotive industry, he shares expert advice on car parts, maintenance, and repairs to help car owners keep their vehicles running smoothly.


