
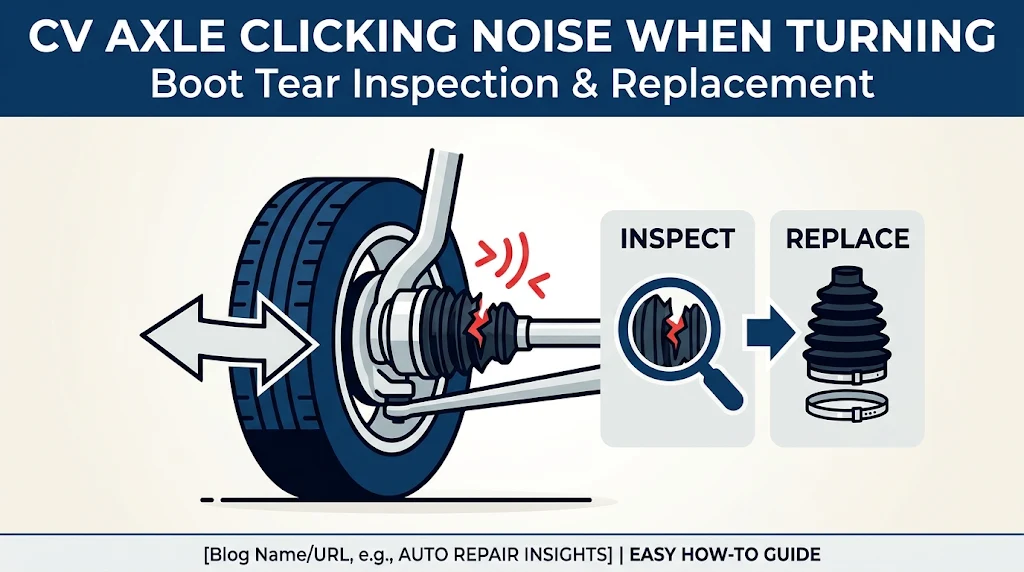
There is few sounds quite as unsettling as a rhythmic, metallic clicking, popping, or snapping noise emanating from your front wheels every time you pull into a tight parking space or make a sharp U-turn. If your vehicle is front-wheel drive (FWD) or all-wheel drive (AWD/4WD), that distinct acoustic warning is almost always signaling trouble with your constant velocity (CV) axle assembly.
Far from being a minor cosmetic quirk, a clicking CV joint is an urgent mechanical cry for help. Left unaddressed, it can lead to catastrophic joint seizure, sudden loss of power delivery, or complete axle separation while driving at highway speeds.
In this comprehensive guide, we will break down the mechanics behind the dreaded CV axle click, walk you through a professional-grade inspection of the CV boots, weigh the pros and cons of boot kits versus full axle replacement, and provide a clear roadmap for correcting the issue before it leaves you stranded.
1. Understanding the Culprit: What Causes That Clicking Noise?
To fix a problem, you must first understand how the system operates. Modern vehicles rely on front-wheel or all-wheel drive configurations to transmit engine power from the transmission and differential out to the front steering wheels. However, because your front wheels must simultaneously pivot for steering and bounce up and down with the suspension, a rigid steel driveshaft cannot work on its own. It would snap instantly.
Enter the Constant Velocity (CV) joint.
How a CV Joint Works
A standard CV axle features two primary joints:
-
The Outer CV Joint (Birfield or Tripod Joint): Located right behind the wheel hub, this joint handles the extreme angles required when you turn the steering wheel left or right. It also absorbs vertical suspension travel.
-
The Inner CV Joint: Located closer to the transmission or transaxle, this joint primarily absorbs the plunging motion and minor angle changes as the suspension compresses and rebounds.
Inside each joint is a precision-machined assembly consisting of an inner race, a cage, heavy-duty steel ball bearings, and an outer race. When these components are operating under load and turning at sharp angles, they slide smoothly within their raceways.
Pro Tip: When an outer CV joint begins to fail, the cage and ball bearings develop excessive internal clearance (wear and tear). Under the torque load of a turn, the bearings begin to skip and slam against the worn raceways, producing that classic, rhythmic click-click-click sound that accelerates with your wheel speed.
The Role of the Grease and the Boot
What keeps this complex mechanical dance operating silently and smoothly? Molybdenum disulfide (moly) grease, sealed tightly inside a flexible rubber or thermoplastic boot.
The CV boot is the unsung hero of your vehicle’s front end. It maintains internal lubrication while keeping out abrasive road contaminants like water, mud, salt, and sand. The moment a CV boot tears, cracks, or punctures, centrifugal force slings the thick moly grease out onto the inner wheel well and brake components. Without lubrication, microscopic metal particles grind away at the joint bearings, leading to rapid friction, heat, and ultimate failure.
2. Step-by-Step Inspection: Spotting a Torn CV Boot Before Failure
Catching a failing CV axle in its early stages can save you hundreds of dollars. Often, a CV boot tears long before the joint actually starts making noise. If you perform routine maintenance or notice grease where it shouldn’t be, you can catch the issue at the “boot stage” rather than the “full axle replacement stage.”
Step 1: Visual Inspection Setup
-
Park on a flat, level surface, engage the emergency brake, and loosen your front wheel lug nuts.
-
Safely raise the front end of your vehicle using a hydraulic floor jack and secure it firmly with heavy-duty jack stands.
-
Remove the front wheels to gain an unobstructed view of the steering knuckles and axle shafts.
-
Turn your steering wheel fully to one lock (e.g., all the way to the left when inspecting the driver’s side outer boot) to expose the folds of the rubber boot.
Step 2: Scanning for Visual Indicators
Shine a high-lumen LED work light into the wheel well and inspect the entire length of the axle shaft, paying close attention to both the inner and outer rubber boots. Look for the following red flags:
-
Grease Splatter: A fresh, glossy black or dark brown residue splattered across the inside of the wheel rim, brake caliper, lower control arm, or inner fender liner.
-
Surface Cracks and Dry Rot: Tiny hairline fissures developing within the accordion-like folds of the rubber boot, typically caused by age, heat cycles, and road ozone.
-
Active Tears or Splits: A gaping separation or puncture in the boot rubber through which grease is actively oozing.
Example: If you spot a fine mist of black grease on your inner lower control arm, your outer CV boot has likely just developed a pinhole or hairline crack. If you catch it immediately, you can clean, repack, and replace just the boot. If the grease is completely gone and you see dry, rusted metal inside the joint, the damage is already done.
Step 3: Physical Joint Play Check
Grab the CV axle shaft firmly with your bare hands and shake it vertically and horizontally.
-
A healthy axle will have minimal, controlled axial play (sliding slightly in and out), but zero radial play or looseness in the joints.
-
If the axle rattles, clunks, or exhibits noticeable vertical slop when shaken up and down, the internal bearings are severely worn and the entire axle assembly must be replaced.
3. To Repair or Replace? CV Boot Kit vs. Complete CV Axle Assembly
When faced with a torn boot or a clicking joint, every DIY mechanic and professional technician must weigh two distinct repair paths: installing a CV Boot Repair Kit or replacing the Complete CV Axle Assembly.
Option A: CV Boot Replacement Kit
-
Best For: Brand-new or very low-mileage vehicles where a boot tore recently from road debris (e.g., a sharp stick or rock puncture), and the joint has not yet been contaminated with dirt or run dry.
-
Cost: Low (typically $15 to $40 for the boot, clamps, and grease packet).
-
Labor Intensity: Extremely high and messy. You must completely disconnect the axle from the wheel hub (or transmission), slide off the old boot, thoroughly clean and solvent-wash the joint bearings, inspect them for scoring, repack them with fresh moly grease, and crimp new metal retaining bands using specialized CV boot clamp pliers.
Option B: Complete CV Axle Assembly Replacement
-
Best For: Vehicles exhibiting clicking noises when turning, high-mileage axles, or boots that have been torn for weeks.
-
Cost: Moderate ($60 to $150 for a brand-new or remanufactured aftermarket axle assembly).
-
Labor Intensity: Moderate-to-high, but often faster and easier than rebuilding a boot. Instead of wrestling with greasy bearings and messy solvents, you simply pull the old axle out as a complete unit and slide a brand-new unit straight into place.
Common Pitfall: Many DIYers attempt to save $40 by buying a cheap boot kit for an axle that has already been clicking. Do not do this. If an outer CV joint is already making a clicking noise, the metal races are pitted and worn out. Replacing the boot will not silence the click, and the joint will likely fail entirely within a few thousand miles. Clicking = immediate full axle replacement.
4. Detailed Replacement Guide: How to Replace a CV Axle
If your axle is clicking or the joint is contaminated, replacing the complete CV axle assembly is the definitive fix. Below is a professional procedural overview of how to execute this repair safely and efficiently.
Tools and Equipment Needed
-
Metric socket set (including deep sockets and breaker bar)
-
Large axle nut socket (typically 30mm to 36mm depending on make/model)
-
Torque wrench capable of high foot-pounds (up to 200+ ft-lbs)
-
Ball joint separator or pickle fork (if necessary)
-
Pry bar and brass drift punch
-
A fresh bottle of gear oil or transmission fluid (to top off what leaks when pulling the inner stub)
-
Safety glasses, heavy mechanics gloves, and drip pans
Step-by-Step Procedure
5. Common Pitfalls and Mistakes to Avoid
Even experienced DIY mechanics can run into trouble during a CV axle swap if they overlook critical details. Keep these common mistakes in mind:
-
Reusing Single-Use Hardware: Many modern vehicles utilize staked axle nuts, single-use pinch bolts, or self-locking nuts. Reusing these hardware items can lead to loose suspension components or a backing-off axle nut, which destroys wheel bearings. Always install new hardware provided with your new axle kit.
-
Damaging the Transmission Seal: When prying out the old inner joint or pushing in the new one, it is very easy to nick the soft rubber lip of the transmission output seal with the sharp steel splines of the axle. A damaged seal will result in a persistent transmission fluid leak that requires re-tearing down the entire job.
-
Forgetting Proper Torque Specifications: Over-tightening or under-tightening suspension pinch bolts and axle nuts can result in catastrophic mechanical failure. Always consult your vehicle’s service manual for exact torque-to-yield and foot-pound requirements.
-
Dropping the Vehicle Before Torquing the Axle Nut: Tightening a high-torque axle nut while the vehicle is lifted on jack stands can spin the entire transmission and differential. Always torque the final axle nut while the vehicle’s weight is resting firmly on its tires, or with an assistant holding the firm brake pedal down.
6. Frequently Asked Questions (FAQs)
Can I drive safely with a clicking CV axle?
No, it is strongly discouraged. While a clicking axle may not snap immediately, the internal cage is failing structurally. Driving on a severely worn CV joint risks total joint separation, which instantly cuts power to the wheels and can cause loss of steering control or severe body damage if the flailing shaft strikes your floorboards or brake lines.
How much does professional CV axle replacement cost?
If you take your vehicle to a mechanic or dealership, expect to pay between $350 and $700 per side, depending heavily on your vehicle’s make, model, and whether it requires removing complex subframe components. Doing the job yourself typically reduces the cost to the price of the part alone ($60–$150).
How do I know if the click is coming from the CV axle or the wheel bearing?
While both can produce clicking or humming noises during turns, wheel bearings typically produce a constant, deep low-pitched growling or humming sound that changes pitch when you swerve side-to-side on the highway. CV axles, by contrast, produce a distinct rhythmic metallic click-click-click that speeds up or slows down exclusively when the vehicle is moving under power through a turn.
How long does a CV axle replacement take?
For an experienced DIY mechanic with air tools and a lift, replacing a front CV axle takes roughly 1 to 2 hours per side. For a beginner working with basic hand tools and jack stands in a driveway, budget 3 to 4 hours to account for stubborn pinch bolts and safety precautions.
Conclusion & Next Steps
A clicking CV axle is an unmistakable warning sign that requires prompt attention. By understanding how the constant velocity joint and its protective rubber boot work together, you can diagnose wear early—saving yourself from expensive towing bills and dangerous road failures. Whether you are tackling a weekend DIY axle swap or dropping your car off at a trusted repair shop, addressing a torn boot or clicking joint immediately restores safety, crisp handling, and peace of mind to your daily drive.
Ready to get your hands dirty or find the exact replacement parts for your specific make and model? Check our catalog for vehicle-specific axle guides and high-durability replacement assemblies tailored to your vehicle.

Benjamin Grey is an automotive engineer and writer at Car Parts Advisor. With years of experience in the automotive industry, he shares expert advice on car parts, maintenance, and repairs to help car owners keep their vehicles running smoothly.


